Dealing with builders' waste after renovation in Sudbury
Renovating a home in Sudbury is exciting right up until the dust, rubble, broken tiles, timber offcuts, old plasterboard, and random bits of packaging start taking over the drive. That is usually the moment people realise dealing with builders' waste after renovation in Sudbury is not a side task at all. It is part of the job. And if you leave it too long, it can become messy, expensive, and a bit of a headache.
Whether you have ripped out a bathroom, knocked through a kitchen, or replaced flooring throughout the house, post-renovation waste needs a proper plan. The good news? It does not have to be complicated. With the right approach, you can clear the site safely, stay organised, and avoid the kind of last-minute stress that always seems to appear on a Friday afternoon. Truth be told, that is when waste piles seem to grow overnight.
This guide explains what builders' waste actually includes, how to handle it in a sensible way, what to watch for locally, and how to choose the right disposal route for your project. If you are also planning future work, you may find it useful to read about house demolition services, excavation services, or even concrete removal if your renovation has grown into something bigger than expected. It happens more often than people admit.
Table of Contents
- Why Dealing with builders' waste after renovation in Sudbury Matters
- How Dealing with builders' waste after renovation in Sudbury Works
- Key Benefits and Practical Advantages
- Who This Is For and When It Makes Sense
- Step-by-Step Guidance
- Expert Tips for Better Results
- Common Mistakes to Avoid
- Tools, Resources and Recommendations
- Law, Compliance, Standards, or Best Practice
- Options, Methods, or Comparison Table
- Case Study or Real-World Example
- Practical Checklist
- Conclusion
- Frequently Asked Questions
Why Dealing with builders' waste after renovation in Sudbury Matters
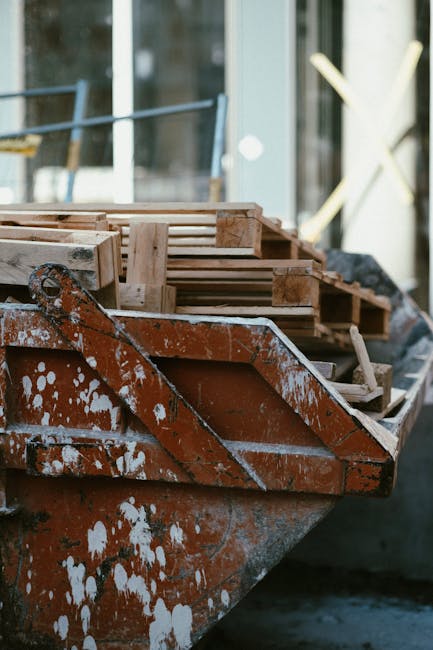
Renovation waste is not just "rubbish". It is usually a mixed load of heavy, sharp, dusty, and awkward materials that need handling in the right order. Broken bricks, plasterboard, tiles, insulation, timber, metal, kitchen carcasses, old units, broken sanitary ware, and packaging all behave differently once they leave the room. Some can be recycled. Some need separate handling. Some are simply too bulky to ignore for long.
In a place like Sudbury, where many projects involve older homes, narrow drives, shared access, or limited on-site storage, waste can quickly get in the way of the job itself. A bag of rubble that seemed manageable in the morning can become a trip hazard by lunchtime. A few sheets of plasterboard leaning against a wall can suddenly be in the path of the next trade. Small issue, bigger delay.
There is also the wider practical side. Good waste management keeps a renovation cleaner, safer, and easier to schedule. It helps with tidy handovers, protects surfaces you have already finished, and reduces the chance of accidental damage. If you are managing multiple trades, it can make a real difference to the flow of the project. In our experience, once waste starts to build up, everything else feels a bit more chaotic than it should.
If your project involves structural work, you may also want to keep an eye on related site services such as site clearance and groundworks. They often sit quietly in the background but make the rest of the work much easier.
Expert summary: The best waste plan is the one that starts before the renovation gets messy. Once you know what is being removed, where it will sit, and how it will leave the property, everything becomes simpler. Not glamorous, maybe, but very effective.
How Dealing with builders' waste after renovation in Sudbury Works
At its simplest, dealing with builders' waste after renovation in Sudbury follows a fairly straightforward path: sort, store, collect, and dispose or recycle. The real skill is in doing each stage without creating more work later. A good system saves time and avoids the common problem of loading everything into one pile and hoping for the best.
1. Identify the waste stream
Start by separating the main material types. Renovation waste often includes inert materials like bricks and concrete, timber, metal, plasterboard, plastics, insulation, and general mixed debris. Some items may also be classed as hazardous or require special care, such as paint tins, solvents, old adhesives, fluorescent tubes, or contaminated materials. You do not need to turn it into a science project, but a basic sort makes a huge difference.
2. Choose a holding area
Pick one space for waste to gather. Ideally, it should be close enough for easy movement but not so close that it blocks access or damages finished areas. On a typical house renovation, this may be the driveway, garden access point, or a protected section of the frontage. If access is tight, smaller staged collections often work better than one huge clear-out at the end.
3. Decide how it will be removed
This is where the practical decision comes in. You might use a skip, a wait-and-load collection, a grab-style removal, or a mixed waste service. For some renovations, a combination works best. For example, rubble and hardcore may suit one method, while lighter mixed waste is better handled another way. If you are unsure, a service that also covers rubble removal and waste removal can be a neat solution.
4. Load efficiently
Heavy items should generally go in first, with lighter and more fragile waste placed on top only if appropriate. Keep different material types separated when possible. It improves recycling potential and can reduce disposal complications. A little bit of organisation here saves a lot of swearing later. That is just the honest truth.
5. Confirm disposal and paperwork
For commercial jobs or larger renovation projects, it is sensible to confirm where the waste will go and whether transfer paperwork is being handled properly. Most homeowners do not want to think about the paperwork side, fair enough, but the right provider should be clear about it. If a company handles demolition and clearance together, you may also want to review their approach to demolition contractors and related project coordination.
Key Benefits and Practical Advantages
A proper waste plan is not just about tidiness. It supports the whole renovation. People often think of waste removal as the last step, but in practice it can affect speed, safety, cost control, and even morale. Yes, morale. A site that is not buried in debris is simply easier to work in.
- Safer working conditions: Less clutter means fewer trips, fewer cuts, and fewer awkward lifts.
- Cleaner finishes: Dust and rubble left around fresh work can damage new surfaces surprisingly easily.
- Better access: Trades can move freely, which helps projects run more smoothly.
- More efficient recycling: Sorting materials properly improves the chance of reuse or recovery.
- Less stress: A clear removal plan reduces that end-of-job scramble when everyone is tired.
- Better use of space: Useful on tight Sudbury properties where access is not always generous.
There is also a financial angle. If waste is handled in stages and separated sensibly, you may avoid paying for unnecessary mixed loads or repeated labour to move the same material twice. That does not mean choosing the cheapest route blindly. It means choosing the one that fits the job. Big difference.
For larger refurbishment projects, many homeowners and contractors also pair clearance with soft strip demolition so unnecessary materials are removed systematically before the main work begins. That can make the whole project feel much more under control.
Who This Is For and When It Makes Sense
This topic matters to more people than you might expect. If you are wondering whether your job is "big enough" to need a real waste plan, the answer is usually yes once walls, floors, fittings, or structural materials are being removed. Even modest renovations can create far more waste than a normal household bin system can cope with.
It makes sense for:
- homeowners renovating kitchens, bathrooms, lofts, or extensions
- landlords refreshing a rental property between tenancies
- builders and trades needing reliable post-job clearance
- property developers managing phased refurbishments
- householders dealing with DIY rip-out waste after a big weekend project
If your project is simply a few bags of cardboard and packaging, a standard household solution may be enough. But once you have rubble, timber, fixtures, plasterboard, or multiple material types, a more structured approach becomes worth it. The same goes if access is awkward, parking is limited, or neighbours are close by. In those situations, "we'll sort it later" has a habit of turning into "why is the whole driveway still full?"
A quick rule of thumb: if the waste would take more than a few trips in a car, or if it includes heavy building materials, plan it properly from the start.
Step-by-Step Guidance
If you want a simple way to tackle post-renovation waste without losing the plot, follow this sequence. It is practical, not fancy, and it works for most domestic and light commercial jobs.
- Walk the site first. Look at what has actually been removed, not what you thought would be removed. Renovation jobs have a funny way of producing extras.
- Separate the obvious materials. Put rubble, timber, metal, plasterboard, and general waste into different piles where possible.
- Identify anything risky. Old paint, solvent containers, insulation dust, sharp metal, and broken glass need extra care.
- Clear a route. Make sure waste can move from the work area to the collection point without crossing fresh finishes or blocking doors.
- Protect surrounding surfaces. Use boards, covers, or simple floor protection if needed. One dropped brick on a new tile floor can ruin your afternoon.
- Book the right removal method. Choose skip hire, wait-and-load, grab collection, or a full clearance service depending on volume and access.
- Load in the sensible order. Heavy materials first, mixed waste second, light debris and packaging last where suitable.
- Check the site after collection. Sweep, inspect, and look for leftover nails, screws, shards, or dust pockets in corners.
If you are planning a wider demolition or strip-out stage, services like demolition services can help join the dots between removal, clearance, and getting the site ready for the next phase. That kind of continuity is often underestimated.
Expert Tips for Better Results
There are a few small habits that make a surprisingly big difference. None of them are complicated. That is exactly why they get ignored. But they help.
Tip 1: Sort as you go, not at the end
Once waste is mixed, it becomes heavier to move and harder to separate. A simple segregation system from day one saves effort later.
Tip 2: Keep a "hot zone" and a "clean zone"
Even on a domestic renovation, it helps to distinguish between active working space and finished or protected areas. The clean zone should stay free from rubble and loose dust. Small thing, but it keeps momentum up.
Tip 3: Don't underestimate plasterboard
Plasterboard is bulky, fragile, and awkward in larger sheets. It often creates more handling trouble than people expect. If you have several boards, plan storage and removal early.
Tip 4: Bag light waste before it spreads
Packaging, offcuts, insulation scraps, and dust can look harmless until a breeze or a busy boot path turns them into a mess. Bagging them early saves repeated sweeping.
Tip 5: Think about access before the waste arrives
Can a collection vehicle reach the property easily? Is there space to load safely? Is the road busy at school-run time? These little details can affect timing more than the renovation itself. A bit annoying, yes, but useful to know.
Tip 6: Keep neighbours in mind
Especially in tighter streets, a tidy frontage and timely removal help reduce complaints. Noise, dust, and blocked access are what tend to cause friction, not the renovation alone.
And here is one more practical tip: if your project includes a large amount of hardcore or mixed demolition debris, ask about a method that suits heavy material rather than just the most convenient looking option. The right method often ends up being the cheaper one in the long run. Funny how that works.
Common Mistakes to Avoid
Most waste problems do not come from one major error. They come from a cluster of small, preventable ones. Here are the repeat offenders.
- Leaving everything until the end: This usually creates a bigger job, not a quicker one.
- Mixing all materials together: It reduces recycling value and can make disposal more awkward.
- Underestimating volume: Renovation waste always seems to breed when nobody is looking.
- Blocking access routes: Makes work slower and increases the chance of damage.
- Ignoring sharp or hazardous items: Gloves, eye protection, and a bit of caution go a long way.
- Choosing a removal method too early or too late: Both can be a problem. Timing matters.
- Forgetting about dust and fine debris: The visible rubbish gets removed first. The fine dust often lingers in corners, vents, and floor edges.
A small real-world example: a bathroom rip-out can look simple at first, but once the old suite, tiles, adhesive, flooring, and packaging are all in one room, the actual waste footprint is much larger than expected. If you have ever opened a door and seen a pile of tile bags leaning slightly like a tired deck of cards, you will know the feeling.
Tools, Resources and Recommendations
You do not need specialist kit for every job, but a few basic tools make waste handling much easier and safer.
- Heavy-duty rubble sacks: Better than thin bags that split halfway to the collection point.
- Wheelbarrow or sack trolley: Useful for heavy materials, especially over uneven ground.
- Protective gloves: Helps with sharp edges, splinters, and dirty materials.
- Dust masks and eye protection: Especially useful when clearing plaster, insulation, or fine debris.
- Floor protection sheets or boards: Worth it if waste must pass through finished rooms.
- Tarpaulins and straps: Handy for bundling timber, sheet materials, or loose debris.
- Basic sorting containers: Even a few labelled piles can stop material mixing.
For larger jobs, it can be useful to work with a provider that understands both clearance and the physical realities of a renovation site. If your project involves structural changes or strip-out, related services such as mini digger hire, skip hire, or asbestos removal may also be relevant depending on what is being taken out. Only use specialist support where the material or situation really calls for it, of course.
A useful recommendation for homeowners is to keep one small "final sweep" kit ready: broom, heavy-duty bags, tape, gloves, and a torch. Sounds basic. It is basic. But on the last day, when you are checking under units or behind doors at dusk, that torch earns its keep.
Law, Compliance, Standards, or Best Practice
Waste disposal in the UK comes with responsibilities, especially if a contractor is involved or if the waste leaves the property via a third party. The exact legal requirements can vary depending on the waste type and who is handling it, so it is sensible to treat compliance carefully rather than casually.
As a general best practice, make sure any waste carrier you use is properly authorised to take the material they are collecting. Ask what happens to the waste after it leaves the site. A reputable provider should be able to explain the process clearly and simply. If they seem vague, that is usually not a great sign.
For renovation waste, the main practical compliance points usually include:
- separating hazardous or specialist materials from general waste
- avoiding fly-tipping risk by using legitimate disposal routes
- keeping transfer notes or records where required for commercial work
- storing waste safely so it does not become a hazard on site
- following local access, parking, and loading expectations where relevant
There are also industry standards of good practice, even where the law does not spell out every detail. For example, keeping recyclable material separate where feasible, preventing contamination of clean waste, and making sure workers use suitable protective equipment. These are not glamorous rules. They are the kind that prevent avoidable problems.
If your renovation uncovers unexpected materials such as old insulation, suspect dust, or previous building remnants, pause and assess before moving them around. Best practice is often just common sense with a bit more discipline. That is all. But it matters.
Options, Methods, or Comparison Table
There is no single right way to deal with builders' waste after a renovation in Sudbury. The best method depends on volume, access, material type, and how quickly you need the site cleared. Here is a practical comparison.
| Method | Best for | Advantages | Limitations |
|---|---|---|---|
| Skip hire | Medium to large volumes of mixed renovation waste | Convenient, familiar, good for ongoing projects | Needs space and may not suit tight access |
| Wait-and-load | Quick clearances, limited space, busy streets | No long-term skip on site, fast turnaround | Requires waste ready for loading at arrival |
| Grab collection | Heavy rubble, soil, hardcore, bulky piles | Efficient for large heavy loads, less manual carrying | Needs suitable access and loading space |
| Full clearance service | Whole-room rip-outs or larger renovation clean-ups | Comprehensive and labour-saving | May cost more than a simple self-managed option |
| Self-haul to a facility | Smaller amounts where transport is easy and permitted | Can be cost-effective for small jobs | Time-consuming, vehicle limits, loading risk |
The best option is often the one that matches the reality of your site rather than the one that sounds cheapest at first glance. A skip might look fine on paper, but if you have no front space and a narrow access lane, it quickly becomes a bad fit. Likewise, a grab lorry can be brilliant for rubble but less useful if your waste is mostly light mixed debris.
Case Study or Real-World Example
Here is a simple real-world style example from a typical Sudbury renovation scenario. A homeowner is refurbishing a semi-detached house and has stripped out an old kitchen, removed some internal plaster, and taken up a section of tired flooring. Nothing outrageous. Just enough to make the room look like a storm has passed through.
At first, the waste was stacked in one corner because it felt quicker. By day two, rubble was mixed with timber, cardboard boxes, old adhesive tubs, and offcuts from the units. The route through the house narrowed. The cleaner parts of the renovation picked up dust. Trades had to step around bags to get into the room. Not ideal.
On the next phase, the approach changed. They separated rubble, bulky timber, and general waste into different piles. They protected the path from the kitchen to the front access point. Heavier material was scheduled for one removal method, and lighter mixed waste for another. The site felt calmer almost immediately. Less mess, fewer obstacles, and less repeated handling. Simple, but very effective.
The key lesson? Waste management works best when it is treated as part of the renovation sequence, not an afterthought. Once people see that, they rarely go back to the old "pile it up and hope" method.
Practical Checklist
Use this before, during, and after your renovation waste clear-up.
- Have I identified the main waste types?
- Do I know which materials need special handling?
- Is there a clear storage area for waste on site?
- Will the waste block access, doors, or fresh finishes?
- Have I chosen the right removal method for the volume?
- Are heavy and sharp materials being handled safely?
- Do I need separate collections for rubble, timber, or mixed waste?
- Have I planned for dust, small debris, and final sweeping?
- Is there enough space for loading or collection vehicle access?
- Have I checked any compliance or record-keeping needs for the job?
- Is the site left safe and tidy after collection?
If you can tick most of those off, you are in good shape. If not, no drama. It just means you may need a slightly better plan before the waste starts spreading.
Conclusion
Dealing with builders' waste after renovation in Sudbury is one of those jobs that can look minor until it is not. Once rubble, timber, plasterboard, packaging, and broken fittings begin to build up, they affect safety, timing, access, and the overall finish of the project. The answer is not to overcomplicate it. It is to handle it early, sort it sensibly, and choose the right removal method for the site you actually have, not the one you wished you had.
For most renovation projects, the winning formula is simple: plan waste from the start, keep materials separate where possible, protect finished areas, and work with a disposal approach that suits access and volume. Do that, and the end of the project feels a lot less frantic. A lot less.
Get a free quote today and see how much you can save.
And if you are still standing in a room full of debris wondering where to begin, take a breath. It always looks worse before it looks better. The clear-up is part of the finish, and once it is done, the whole place feels ready to breathe again.
Frequently Asked Questions
What counts as builders' waste after a renovation?
It usually includes rubble, bricks, concrete, plaster, plasterboard, timber, old fixtures, tiles, metal, packaging, insulation scraps, and general debris created during construction or refurbishment work.
Can I put renovation waste in my normal household bin?
Usually no, not if it is bulky, heavy, or made up of building materials. Household bins are not designed for most renovation waste, and mixing them can cause collection problems.
What is the easiest way to remove builders' waste from a house in Sudbury?
The easiest method depends on access and volume. For many domestic jobs, skip hire, wait-and-load, or a full clearance service is more practical than trying to move everything yourself.
Do I need to sort renovation waste before collection?
Sorting is not always mandatory for small domestic jobs, but it is usually a smart move. Separating rubble, timber, metals, and general waste can make disposal simpler and sometimes more efficient.
What should I do with plasterboard waste?
Keep plasterboard separate if possible. It is awkward to mix with general rubble and may need specific handling depending on the disposal route being used.
Is it worth hiring a skip for a small renovation?
Sometimes yes, sometimes no. If the waste is limited and access is good, a smaller collection method may be enough. If the job is ongoing or the waste will build up over several days, a skip can be very convenient.
What if I do not have space for a skip?
That is common on tighter properties. In those cases, wait-and-load or grab collection may be better because they reduce the need for long-term storage on site.
Can builders' waste include hazardous materials?
Yes, it can. Old paints, solvents, certain insulation materials, and other suspect items may need separate handling. If you are unsure, stop and get proper advice before moving them around.
How can I keep dust down during waste removal?
Use covered transport where possible, bag light waste early, sweep regularly, and protect fresh finishes. Dust tends to move into corners and fabric areas surprisingly fast, so a little routine helps a lot.
What is the safest way to handle heavy rubble?
Use suitable lifting methods, avoid overfilling bags, and consider wheelbarrows, trolleys, or a professional collection service for larger quantities. Heavy materials are where people often strain themselves, so do not rush it.
Do I need paperwork for renovation waste?
For some commercial work, yes, records or transfer notes may be needed. For domestic jobs, the process is usually simpler, but it is still wise to use a legitimate waste carrier and keep basic confirmation of disposal.
What is the main mistake people make with renovation waste?
The biggest mistake is leaving it until the very end and mixing everything together. That usually creates more work, more mess, and more cost than necessary.